
Asset Editor
Introduction
The Asset Editor is the central hub for inspecting, modifying, and creating assets within the Cranberry Engine. This guide provides a comprehensive overview of its architecture, supported asset types, and the workflows that drive efficient content creation.
Architecture Overview
At its core, the Asset Editor is built around three interlocking concepts:
- IAssetEditor Interface – The contract that every editor implementation must fulfill. It provides access to the target asset, a mutable editing copy, and lifecycle methods such as
buildDockerNodes,drawAssetEditor,needsMenuBar, andcloseEditor. - Editor Factory – Responsible for selecting the appropriate editor class based on asset type, state, and global settings. The factory also duplicates assets and auxiliary objects (e.g., worlds) to isolate edits until they are committed.
- Detail Editor Pipeline – Shared rendering and property editing logic that ensures a consistent experience across all asset classes, while still permitting per‑asset overrides.
Two primary editor base classes derive from this foundation:
- ICoreAssetEditor – Handles basic property editing without requiring a 3D viewport.
- IEngineAssetEditor – Extends
ICoreAssetEditorwith ImGui callbacks that enable viewport integration, used by editors such asCBEditor.
Editor Types and Asset Customization
Core Asset Editor (ICoreAssetEditor)
Ideal for assets that consist solely of serializable properties—such as data tables, configuration files, or simple textures. The core editor presents a tabular view of fields, supports inline editing, and automatically syncs changes with the underlying asset file.
Engine Asset Editor (IEngineAssetEditor)
Designed for assets that require a live 3D view, such as ActorPrefab, World, or Material. This editor embeds ImGui viewport windows, registers ImGui callbacks for camera manipulation, and integrates tightly with the engine’s rendering pipeline to provide real‑time visual feedback.
Customization Hooks
Developers can supply custom implementations of IAssetEditor to inject specialized UI widgets while reusing the shared detail editor infrastructure. Customization is achieved by:
- Extending
buildDockerNodesto add dock panels. - Overriding
drawAssetEditorto render bespoke property editors. - Implementing
needsMenuBarto control menu bar visibility. - Providing custom
onFieldModifiedcallbacks for field‑level side effects.
These hooks make it possible to create specialized editors—for example, a terrain editor that adds height‑map painting tools without rewriting the entire property grid.
Asset Types and Their Editing Requirements
| Asset Type | Description | Customization Needs |
|---|---|---|
| Actor Prefab | 3‑D assets with hierarchical components that often require viewport interaction. | Full viewport, sub‑object hierarchy editing, selective field exposure, and material preview synchronization. |
| Generic Assets (e.g., Data Tables) | Simple property‑only assets. | Reuse the generic details editor; can serve as a fallback for any asset class. |
| Custom Detail Assets | Assets that need extra property widgets while sharing the base detail editor. | Extend the generic editor with custom widgets, leveraging factory overrides. |
| Viewport‑Required Assets | Assets that need both 3D viewport and specialized field customization. | Combine class‑level and field‑level customization to hide unwanted reflections and expose only relevant properties. |
All editor implementations share a common code path for the details editor, ensuring consistency while allowing per‑asset overrides.
Undo/Redo State Management
The Asset Editor integrates natively with Cranberry’s transaction system. Each edit creates a transaction that records the before/after state of the editing copy. The transaction updates the dirty flag according to the following table:
| Current State | After Undo | Final Dirty | Reason |
|---|---|---|---|
| Clean | Clean | Dirty | A saved edit marks the asset dirty, requiring further saves. |
| Clean | Dirty | Dirty | Any edit transitions to dirty. |
| Dirty | Clean | Clean | Returning to an unmodified state clears the dirty flag. |
| Dirty | Dirty | Dirty | Remaining modifications keep the asset dirty. |
Undo and Redo operations automatically adjust the dirty flag, giving developers an accurate perception of the edit state without manual bookkeeping.
Material Editing Workflow
Material fields are special because changes must propagate instantly to all preview worlds and persist across saves. The workflow is:
- Update Callback – When a material property changes, the editor invokes a registered callback.
- Bridge Processing – The callback notifies the world‑renderer bridge, which batches the update and forwards it to every active world renderer.
- Runtime vs. Editor – At runtime, material instances are dynamic; in the editor, updates are applied to every open world to keep previews in sync.
- Live Preview – Material previews refresh in real time, allowing artists to see the exact result of their changes. #TODO
Switching Component Materials
When editing an ActorPrefab, switching a component’s material triggers a dedicated event:
- Material‑Dirty Event – Emitted whenever a component’s material field is modified.
- World Renderer Bridge – Listens for this event and refreshes the visual representation across all dependent worlds.
- Editor Widget – Utilizes field metadata (
onFieldModified) to detect material changes, optionally leveragingFieldMetaDatacallbacks for finer control.
Because material changes can affect many dependent worlds, the editor also updates the asset’s reference graph to reflect new material assignments.
Package Reference Graph
The engine maintains a reverse dependency graph to track which packages reference a given asset:
- Node Generation – Nodes represent hard asset links (e.g.,
ObjectPath). Soft links used only for editor‑internal concerns are excluded. - Circular Dependencies – Ignored unless they impact visual updates.
- Regeneration – The graph is rebuilt on package save or scan events and stored within
AssetManager. - Performance Mitigation – By operating on package‑level rather than per‑object nodes, the system avoids exponential growth in graph size.
Practical Editing Workflow
- Open an Asset – From the Content Browser, double‑click an asset to launch its editor. The factory selects the appropriate editor class and duplicates the asset for editing.
- Edit Properties – Use the property grid or custom widgets to modify fields. Changes instantly update live previews.
- Undo/Redo – Use standard shortcuts (
Ctrl+Z,Ctrl+Shift+Z) to roll back or redo edits. The dirty state updates automatically. - Save – Press
Ctrl+Sor click the save button. The editor writes the modified copy back to the asset file, updates the reference graph, and marks the asset clean. - Close Editor – The editor cleans up resources, closes its ImGui windows, and returns control to the Content Browser.
Best Practices and Tips
- Leverage Customization Hooks – When a new asset type is introduced, create a thin wrapper editor that extends an existing base class rather than duplicating entire implementations.
- Keep UI Concise – Use collapsible sections and tabbed panels to avoid overwhelming the user with unrelated fields.
- Performance Awareness – Large worlds can cause frame‑rate drops during material updates; consider batching updates or limiting live preview to a single viewport.
Conclusion
The Asset Editor in Cranberry Engine represents a mature, extensible solution for editing a wide variety of assets. By separating concerns into a clear interface, a flexible factory, and a shared detail pipeline, the architecture supports everything from simple data tables to complex, viewport‑driven prefabs. Its robust Undo/Redo integration, live material preview, and dynamic package reference tracking empower developers to iterate quickly while maintaining a clean, predictable workflow. Adopting the patterns described in this guide will help you harness the full power of the Asset Editor and streamline your content creation pipeline.
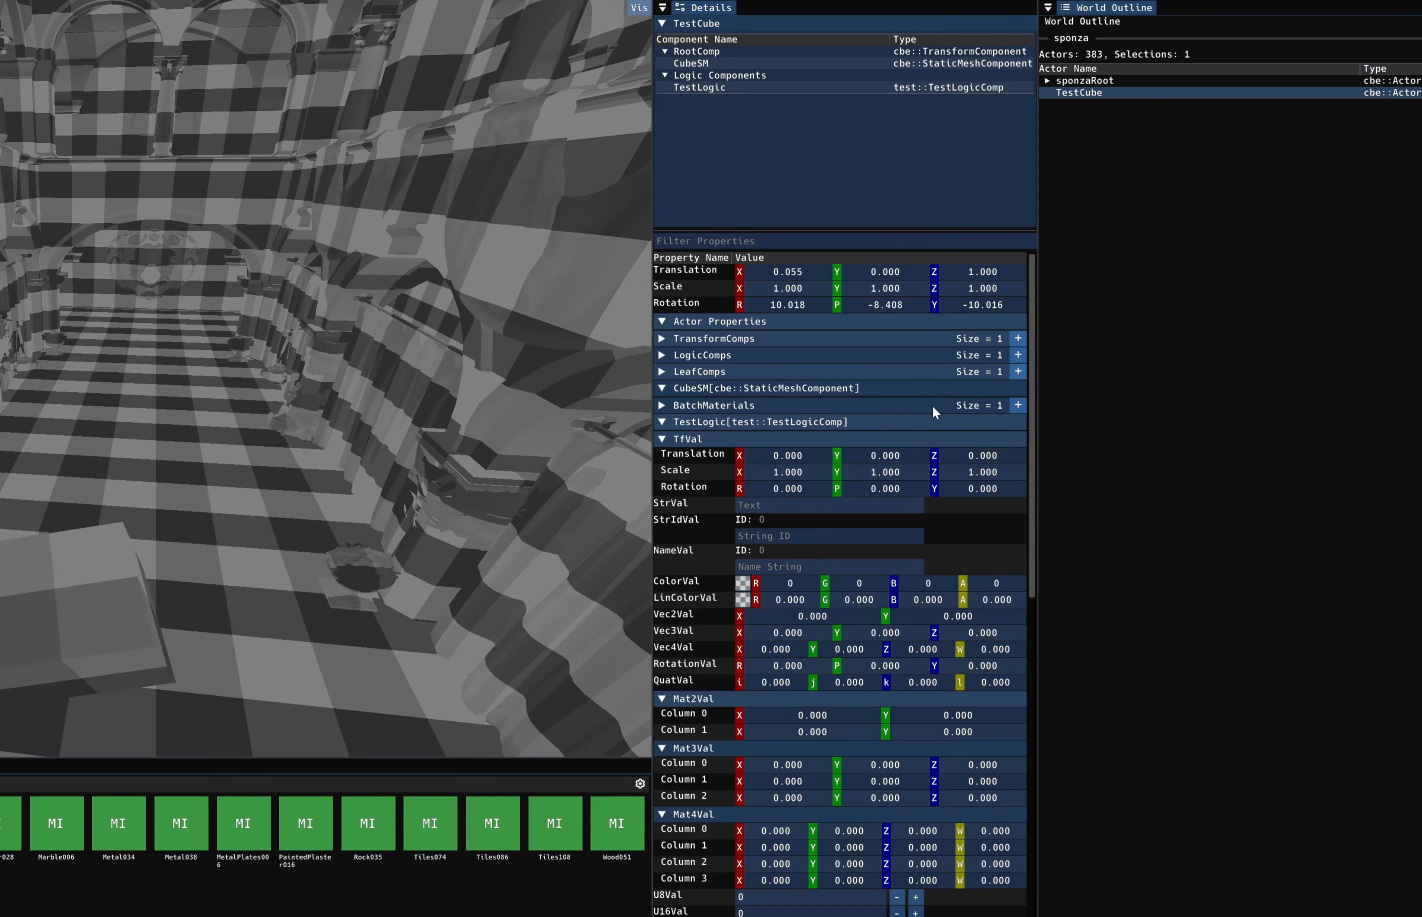
Screenshot
.jpg)

Comments